It’s beginning to feel like Fall…at least my latest Fix from Stitch Fix makes me feel Fall is closely on the horizon.
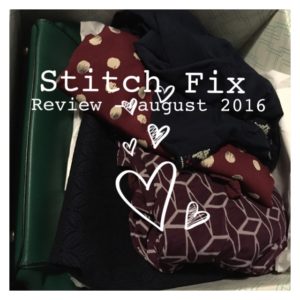
For my August Fix I requested a satchel bag, a skirt, and for the most part told my stylist to pick out whatever she felt would fit my style based on past fixes and my Pinterest Board.
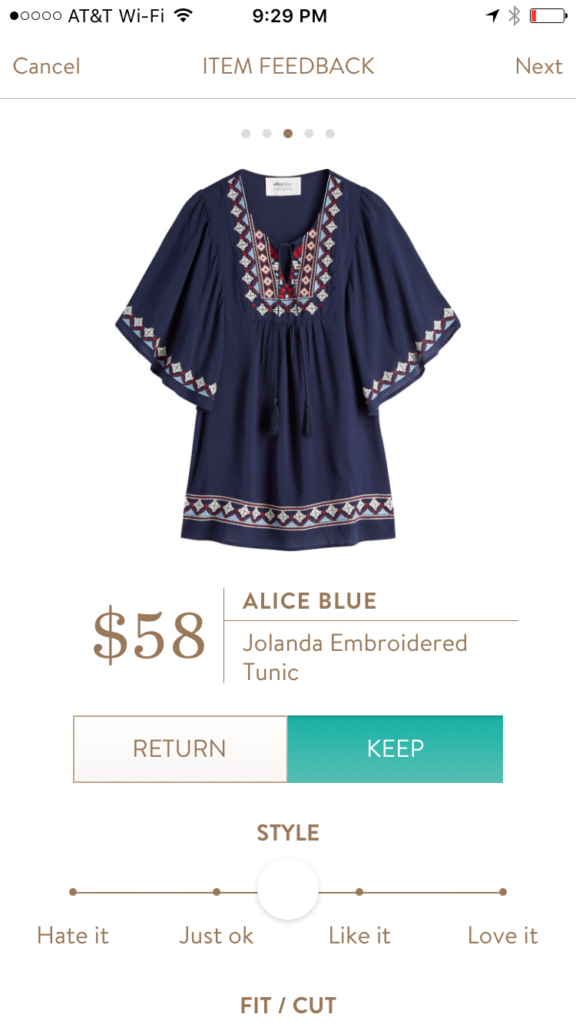
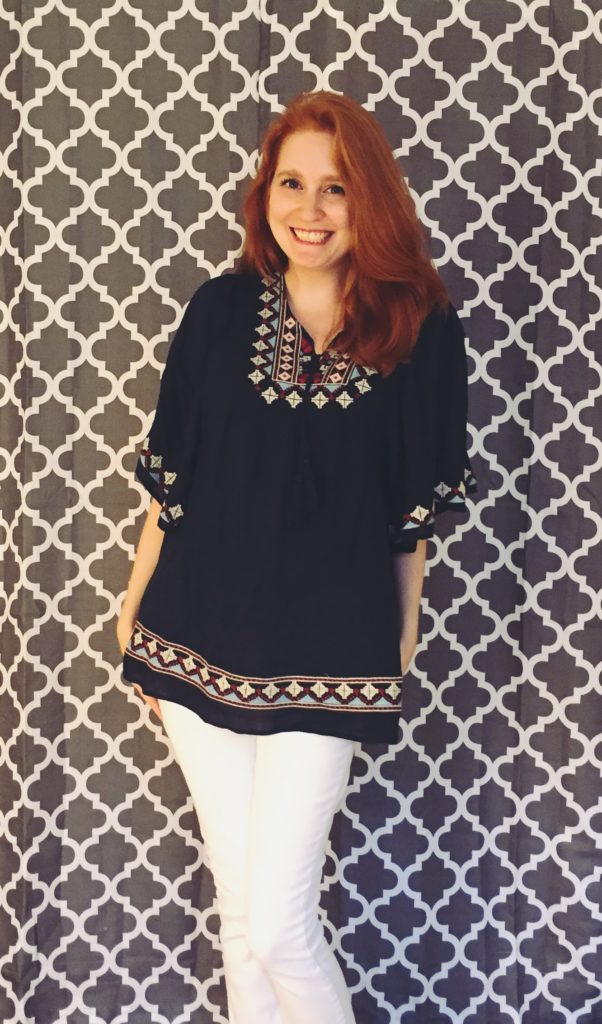
#1 – Jolanda Embroidered Tunic by Alice Blue
I’ve been hoping and hinting for a tunic top for a couple months now, so I was excited when I read my note from my stylist that she included one in my latest fix. This tunic by Alice Blue is an essential for Fall. This top is super airy, has massive sleeves that make me feel I could potentially fly away, and the color/style just shouts Fall is here! I can’t wait for the cooler weather to blow in so I can wear this to work.
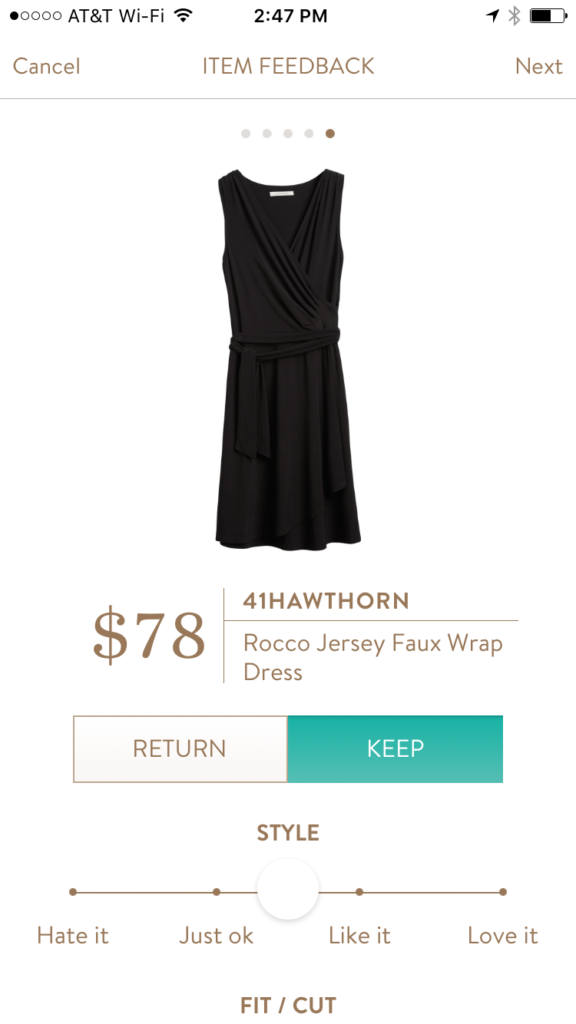
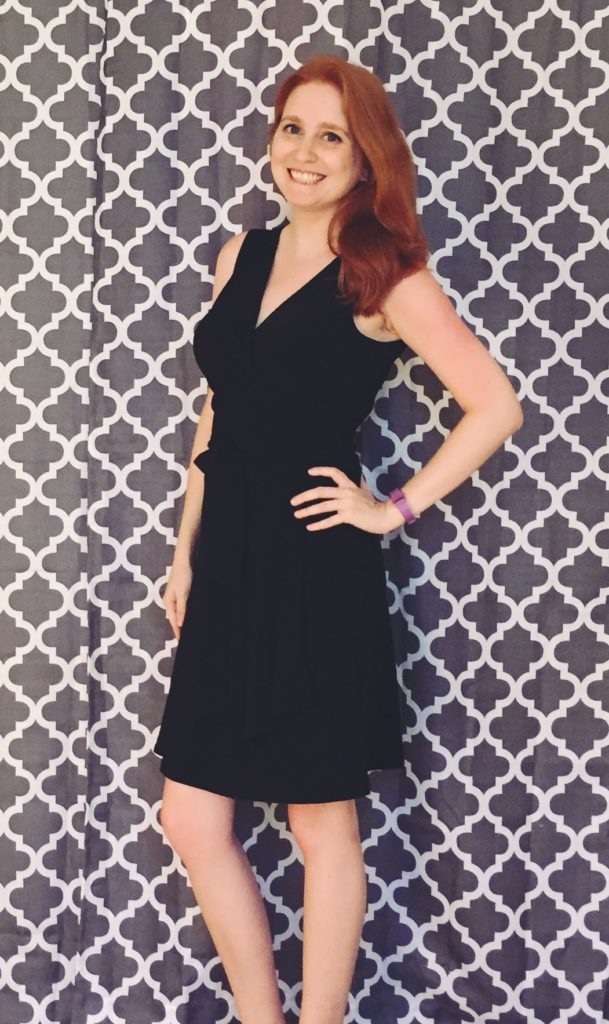
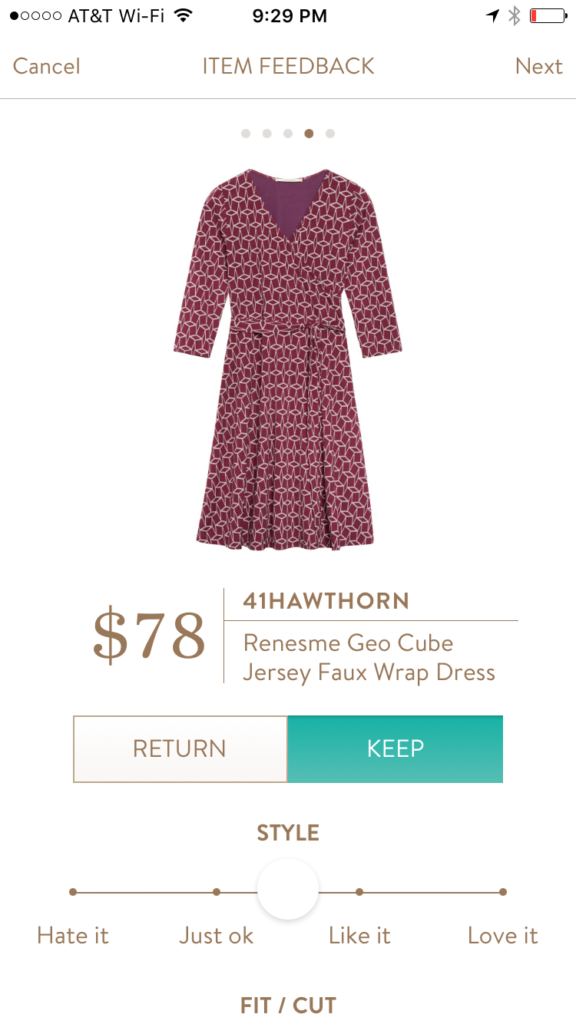
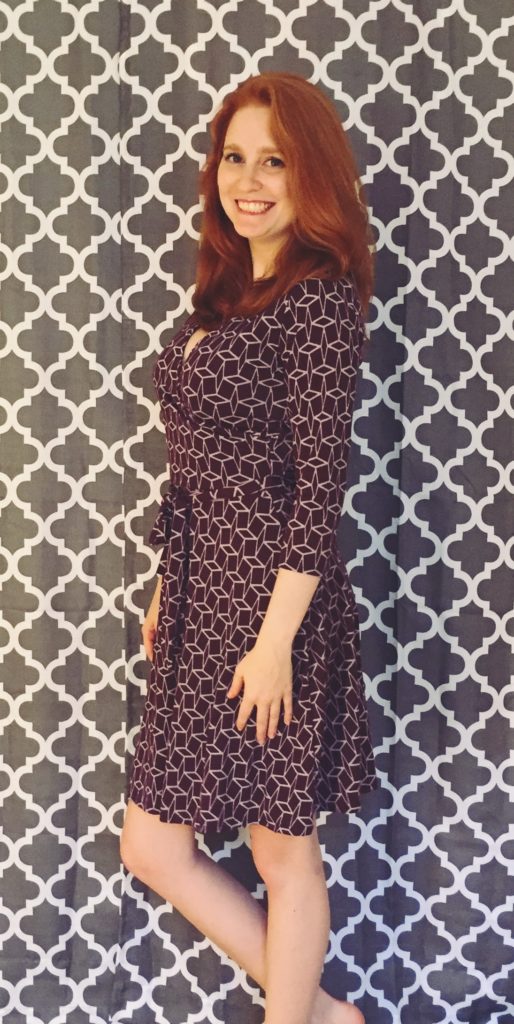
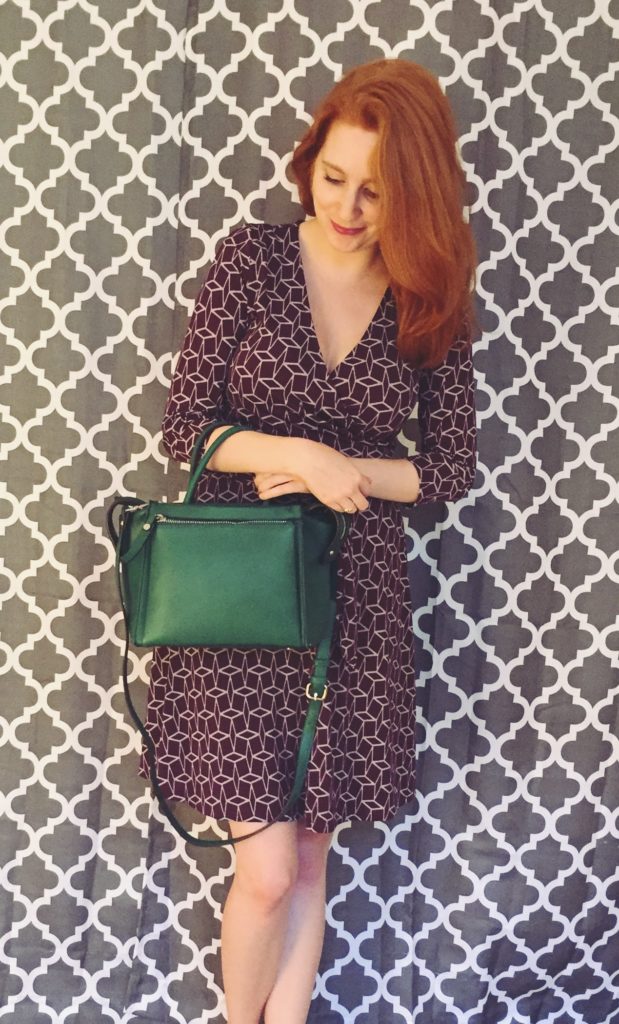
#2 – Renesme Geo Cube Jersey Faux Wrap Dress by 41Hawthorn
First things first, I’ve read and seen all the Twilight books and movies so my first thought when I saw the name of this dress brought me back to my college days with my roommates, reading the series and seeing it in the theatres. Anyways, moving on. This dress is amazing! It’s absolutely fabulous and I’m in love. It’s super comfortable, flattering, and such a lovely print. Another classic Fall piece. My stylist picked this one right from my Pinterest board, and I couldn’t be more pleased with it. Definitely a must request item.
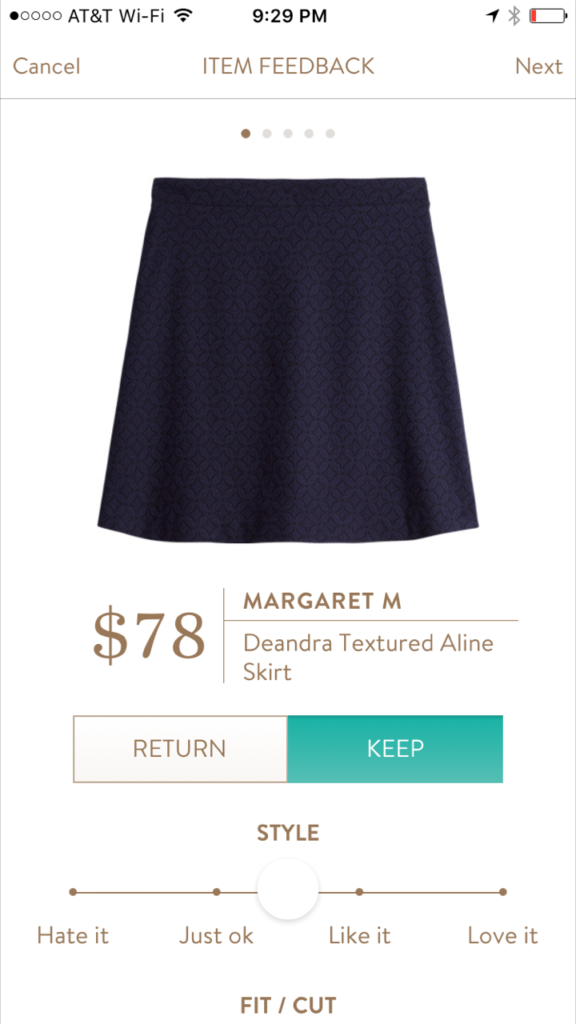
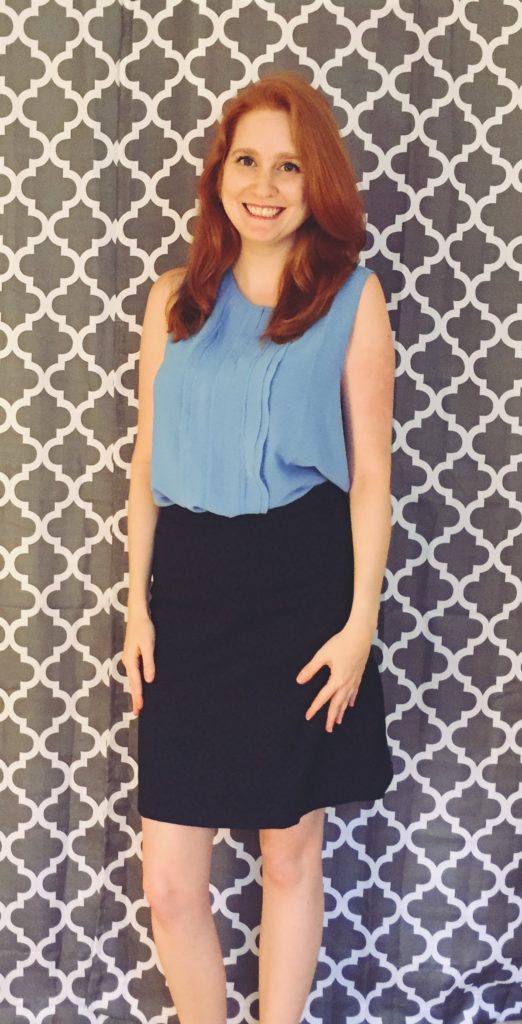
#3 – Deandra Textured Aline Skirt by Margaret M
For some reason I decided to be “daring” this month and request my first ever Stitch Fix skirt. Now, I’m not much of a skirt person at all, but I kept seeing beautiful images of outfits with skirts on Pinterest, so I was curious if I could pull one off. I’ve tried Margaret M pants before, and have loved them, so I was excited to see my stylist decided to go with that company for my first Stitch Fix skirt. Margaret M is all about flattering figures and providing pieces that thin you. This skirt is cute, but one thing to note is that it really showcases off all your curves. You can totally make out the shape of my lower stomach, something I’m not used to highlighting. If you’re uncomfortable with the skirt hugging your curves, pull up the skirt higher up your torso, turning it into a high waisted skirt, this instantly smoothes you without the cling, giving you a polished looked. It’ll take some getting used to, but I can’t wait to pair this skirt with some of my previous Fix shirts. Pro tip, this skirt looks amazing with flowy tops.
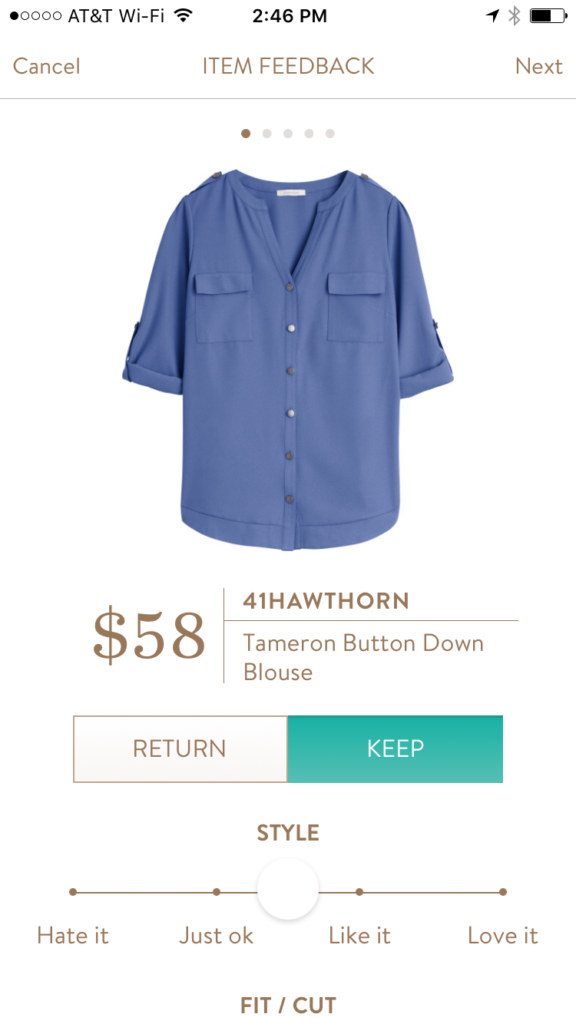
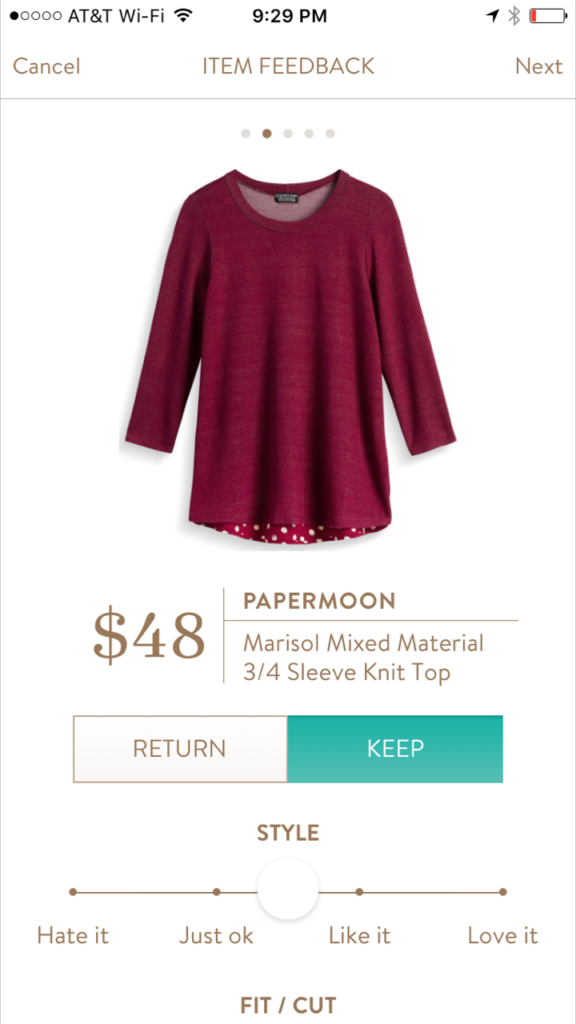
#4 – Marisol Mixed Material 3/4 Sleeve Knit Top by Papermoon
What a cute and comfortable top this is! I love the colors and design. In fact, I secretly wish the whole top was the same pattern that’s on the back. This top feels like butter, it’s so soft. My stylist suggested I pair this top with my new Margaret M skirt, which color wise goes perfectly together. Once it’s a bit cooler out, I’ll have to take the whole outfit out on the town, or let’s be honest, wear it to work 🙂

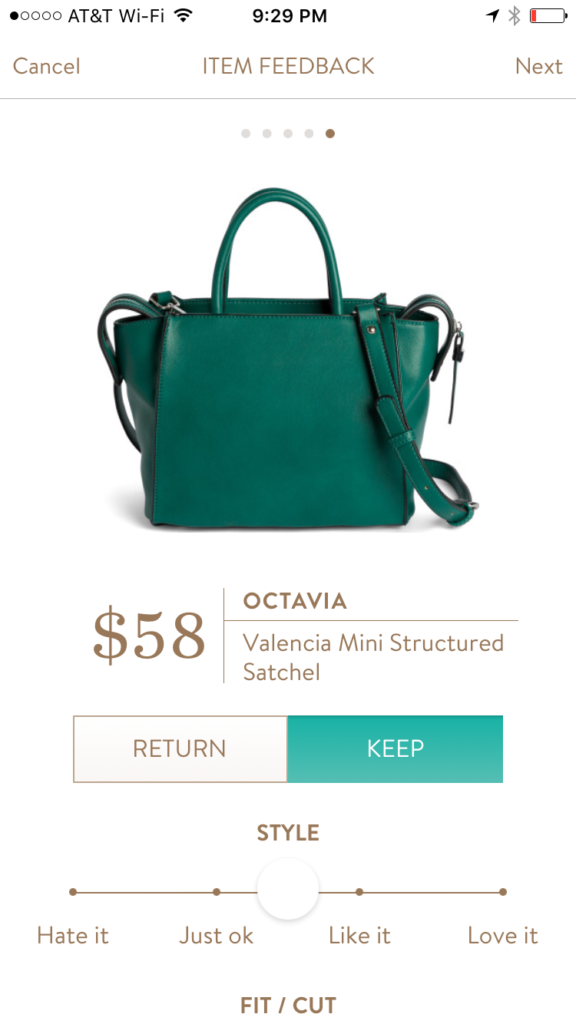
#5 – Valencia Mini Structured Satchel by Octavia
My all time favorite bag is one with a cross body strap, it makes traveling a breeze and I don’t have to worry about losing my purse. I’ve been dying to find the perfect Satchel bag since some of my cross body bags have seen much better days. I had requested one in burgundy, but none were available, but this color (Teal according to my stylist) is fabulous, and maybe a new favorite! It’s the perfect size for me, and there’s still plenty of empty space inside after I’ve added in my usual purse essentials. I love that you can opt to wear it on your arm, or cross body. The cross body strap is also removable, which is always a great bonus. The satchel has a wonderfully spacious zipper compartment on the outside, a zippered pocket within the main part of the bag, along with an extra pocket. I’ve literally used this bag everyday since my fix arrived, it’s perfect!
Final Thoughts: I’ve lucked out and had another great fix. I’m super excited for Fall to come so I can enjoy some of these pieces more. This fix also taught me to keep my mind open, like with the skirt, and not to be afraid of color (satchel bag!). I ended up keeping everything, and am looking forward to seeing what my stylist has in mind for me next month. I’m hoping I’ll get the perfect pair of black leggings, and maybe a fun Fall jacket! Until next time, happy fixing!
Suggestions for a better fix:
- Be very specific. If there are certain pieces or types of clothing you really want, provide that in your styling note to your stylist.
- Create a Pinterest Board. Stylists will check them out if you keep mentioning them in your style notes.
- Call out designers or names of actual articles of clothing . Your stylist may not provide those exact items but they’ll start to get a better sense of what style you’re into.
Don’t forget to follow my Pinterest Boards for more Stitch Fix fun!