One of my favorite hobbies is painting. My interest started with acrylic paints, but nowadays I have a strong love for watercolor painting. Recently, I decided to go back to my acrylic painting “roots” and get out some stress creating a simple flower design, just painting petals.
What you’ll need:
Water (to clean brushes)
Brushes
Acrylic paint (minimum 3 colors)
Small canvas
You could use a stencil if you wanted to create the pedals/leaves, but I just free handed everything.
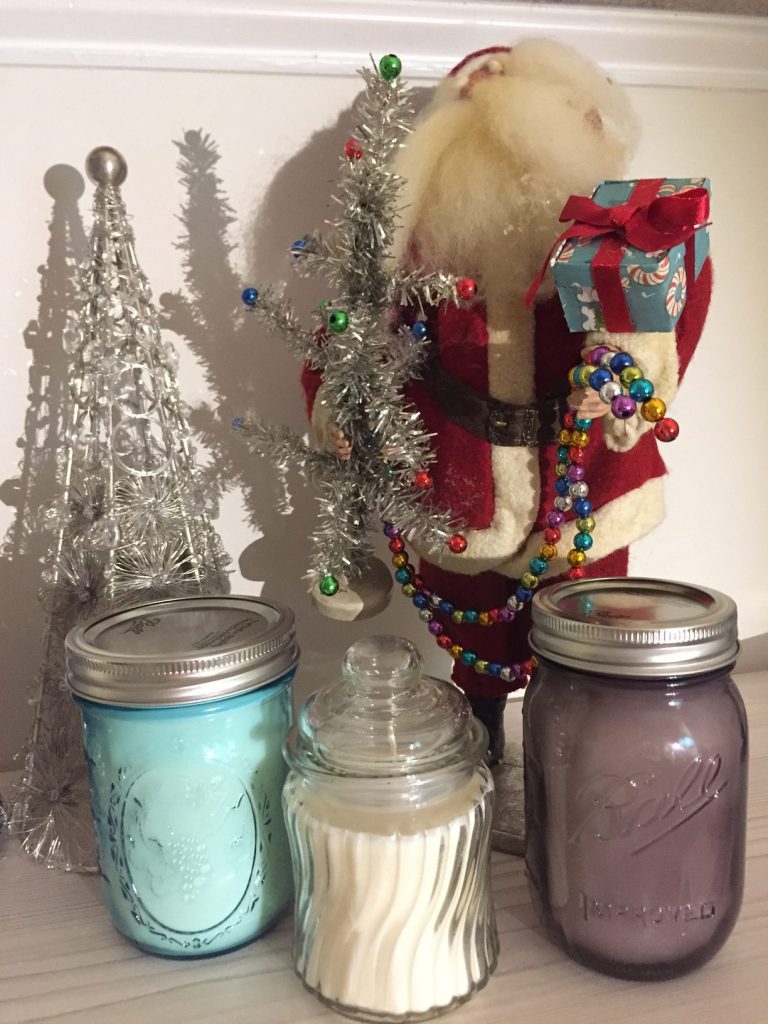
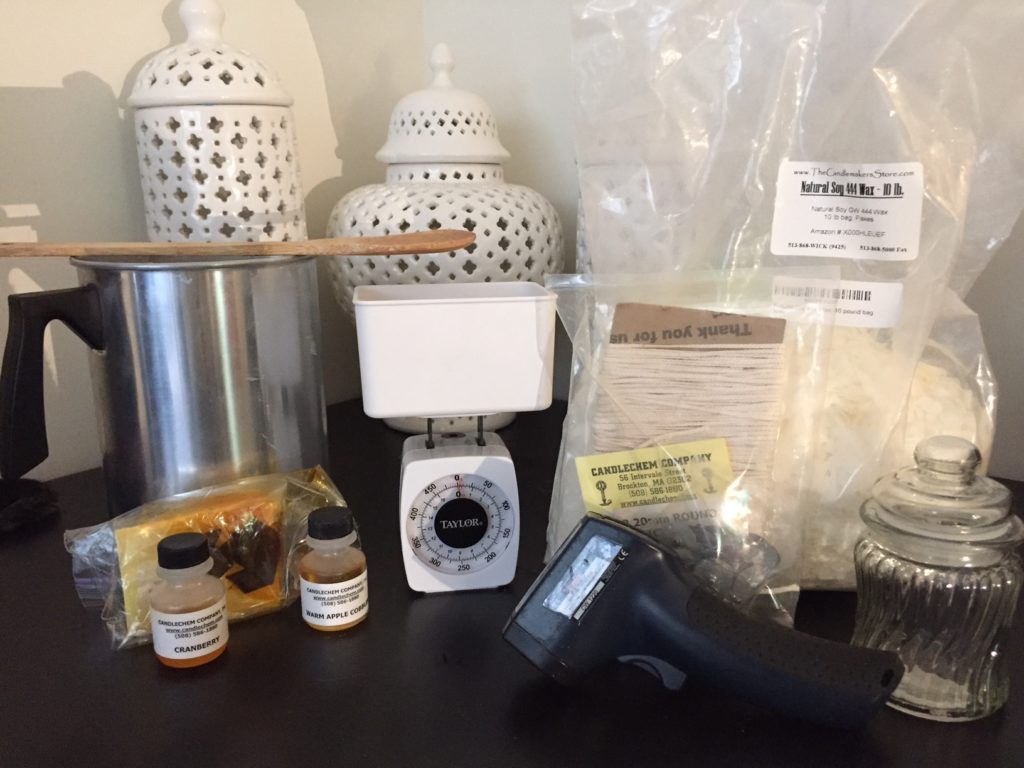
It’s the holiday season and the time for giving. I’ve always been a fan of providing homemade gifts along with store bought goodies to really show some extra thought and appreciation to those in your lives. A few years ago I decided I was going to try my hand at creating homemade candles, and it was a success. Every year since, my family looks forward to receiving a candle in their favorite scents. Since candles are always a safe gift idea, I wanted to create a simple 7 step how to guide on how to make your own candles so that you can give a little something extra this year.
Supplies:
Wax pouring pot (4lb)
Wax (Soy) – Soy is easier to find and has great scent throw.
Wicks
Wick stickers
Wick tabs
Metal Wick Bars
Jars
Infrared thermometer
Scents
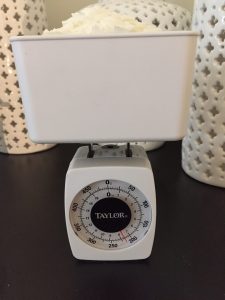
Scale (you can use a food scale)
Wooden Spoon
Optional Supplies
Dye/Color chips for your wax
Where to buy candle supplies:
You can find candle making supplies all over the place, from craft stores, ebay, Amazon, and everywhere in between. Most of my supplies have come from a small company in Massachusetts called Candle Chem. They’ve gots tons of dyes, wicks, jars, scents beyond your wildest imagine and every other supplies or accessory you could ever need for candle making. They’re great and I highly recommend them! For fast wax supplies, I use Amazon.
Making your own candles:
Step 1: Begin by prepping your jars. I’ve picked up some mason jars from the Christmas Tree Shops and little glass jars with lids, typically used for candies, at the Dollar Tree. Wash the insides of your jar with a damp paper towel and let dry.
Step 2: Prep your wicks. If you don’t buy the already put together wicks, you’ll need to fasten all the pieces together. Cut your wick into 6-7 inch pieces for mason jars, and 4 inch pieces if you’re using the Dollar Tree glass candy jars. You want to leave extra room so your wick doesn’t fall into the wax.
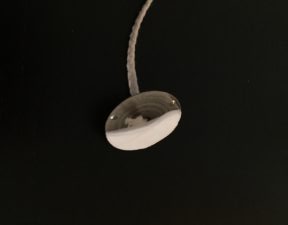
Thread the wick through the metal wick tabs and leave a little extra at the bottom.
You’ll now cover that left over wick string with a wick sticker that will attach your tab and wick together, and it’ll keep your wick in place inside your candle.
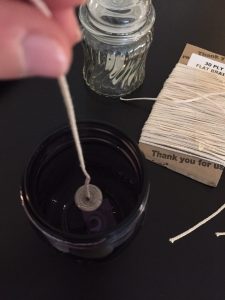
Step 3: Place your wick into the center of your jar and use your wooden spoon to stick the tab into place. It can be tricky to get the wick right in the center. It’s ok if it’s not perfect, it won’t make your candle any less pretty or less functional!
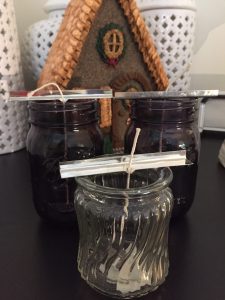
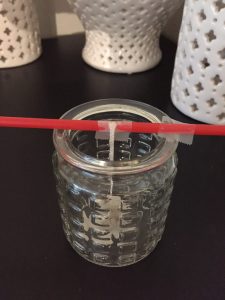
Step 4: Slide wicks through metal wick bars to keep the wicks in place. If you don’t use something to keep the wick in place, it’ll move all around the heated wax and have trouble staying upright. If you don’t have metal wick bars, fear not – use a straw and some tape!
Step 5: Measure out your wax. I use a little portable food scale. Since the wax fills up my container pretty quickly, I usually fill the scale up twice with around 7 oz of wax each time for a standard mason jar. I recommend always having a bit more wax than you expect because you never want to pour and then realize you don’t have enough wax to fill your container.
For other containers, a great trick for figuring out how much wax to use is to fill the container with water and then weigh it to see how many ounces you’ll need.
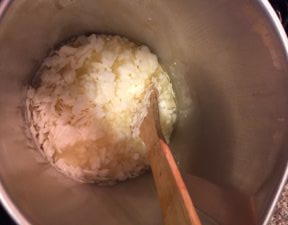
Step 6: Melt your wax. I use a 4lb wax pouring pot that you can get at craft stores and online. I usually work with 1 lb at a time because I like to make small batches of scents. Use your wooden spoon to stir and help melt the wax quicker.
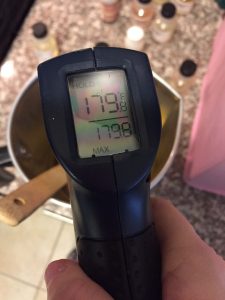
Each wax will be slightly different, but in general soy wax should be heated up to 155 degrees fahrenheit, ensuring all wax chunks are completely melted down, no one wants to pour a lumpy candle 🙂 I recommend using a infrared thermometer for keeping track of your wax’s temperature, plus it’s kind of fun pointing it at random things and seeing how hot they are.
Time to cool down this wax to 155.
Once your candle is around 155 degrees fahrenheit, it’s time to add any dyes and scents you want. I occasionally color my candles, trying to match the scents I’m working with (i.e. Apple = red or pink), but it’s easier to just use the natural wax color giving you a beautiful white candle. If you used a colored jar there’s no need to dye your wax. If you add a scent or color, I recommend stirring them in for a minute or so until everything is fully blended. It’s recommended to use 1 ounce of scent for every pound of wax.
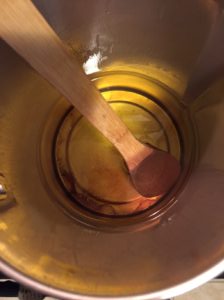
Cool the wax down to around 125 degrees fahrenheit before pouring it into your jars. I typically set the pot on the counter to cool down, stirring every now and then.
Step 6: Gently pour wax into your jar. Be careful not to bump the wick bar.
Step 7: Let your candle cool for 24 hours and try not to move it so it settles correctly.
During this process you may notice some of the sides of the candle seem kind of frosty, this is known as frosting and happens due to crystallization and is typical in soy candles. It doesn’t affect the candle at all, and can be avoided by making sure you don’t pour your wax at a high temperature. I’ve learned to embrace frosting when it happens and it usually goes away after burning the candle during use.
After your candles are fully cooled and have sat for 24 hours, cut the wick and enjoy your creation!
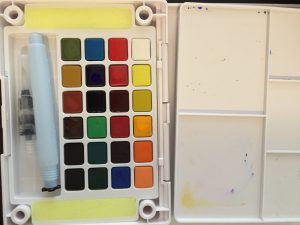
I’ve been big into watercolors lately. During my spare time on the weekends, or after a long stressful day at work, I love to pull out my Koi Watercolors Pocket Field Sketch Box and paint. I’ve been working on a personal series of paintings for my apartment, focusing on “under the sea” as a theme. I’ll be sharing a bit about that in the near future.
When my mom saw my sea life paintings she fell in love with them, and wondered if I could make her a flamingo painting. Flamingos are my mom’s favorite. I don’t know why or how they came to be her favorite, but they are. I’ve never created a flamingo before, so here’s to a new challenge!
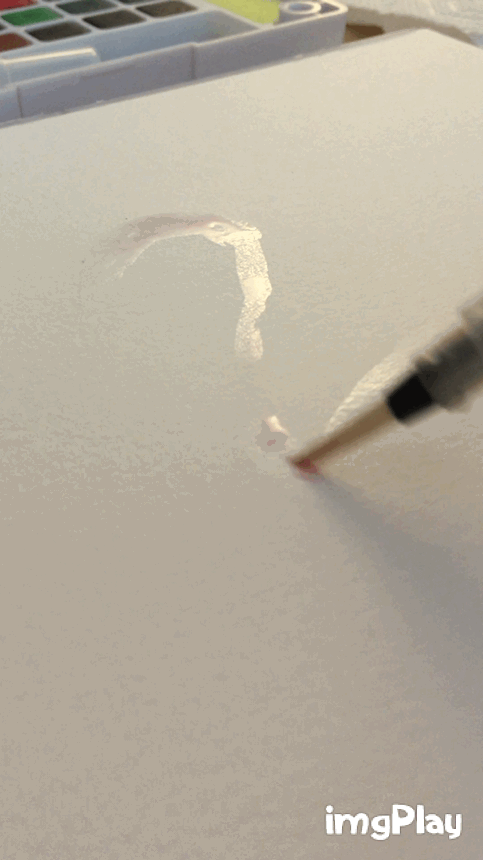
Let’s start by drawing out the shape of the flamingo’s neck and body with a wet brush, no paint.
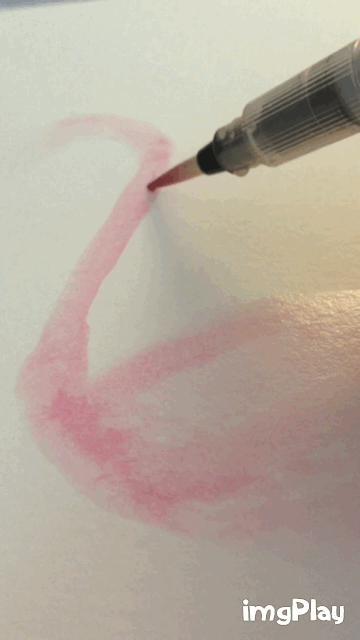
Once we have water down on the paper, it’s time to add some color. I mixed red with a lot of water to dilute the color.
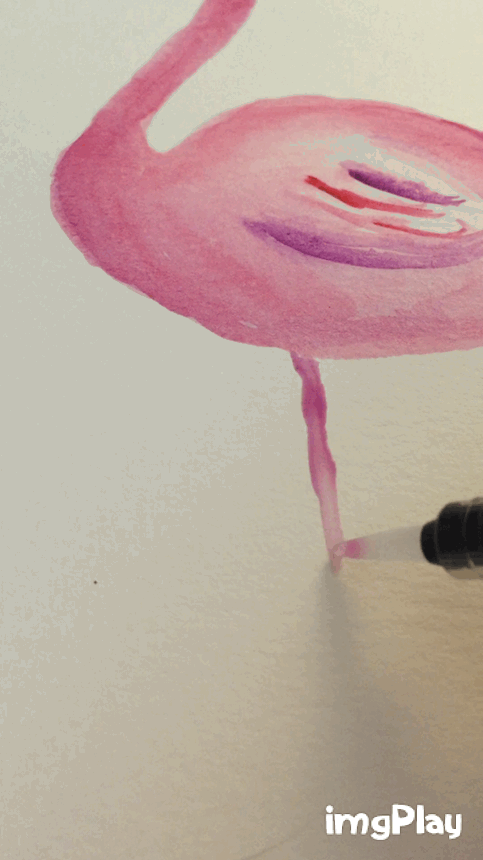
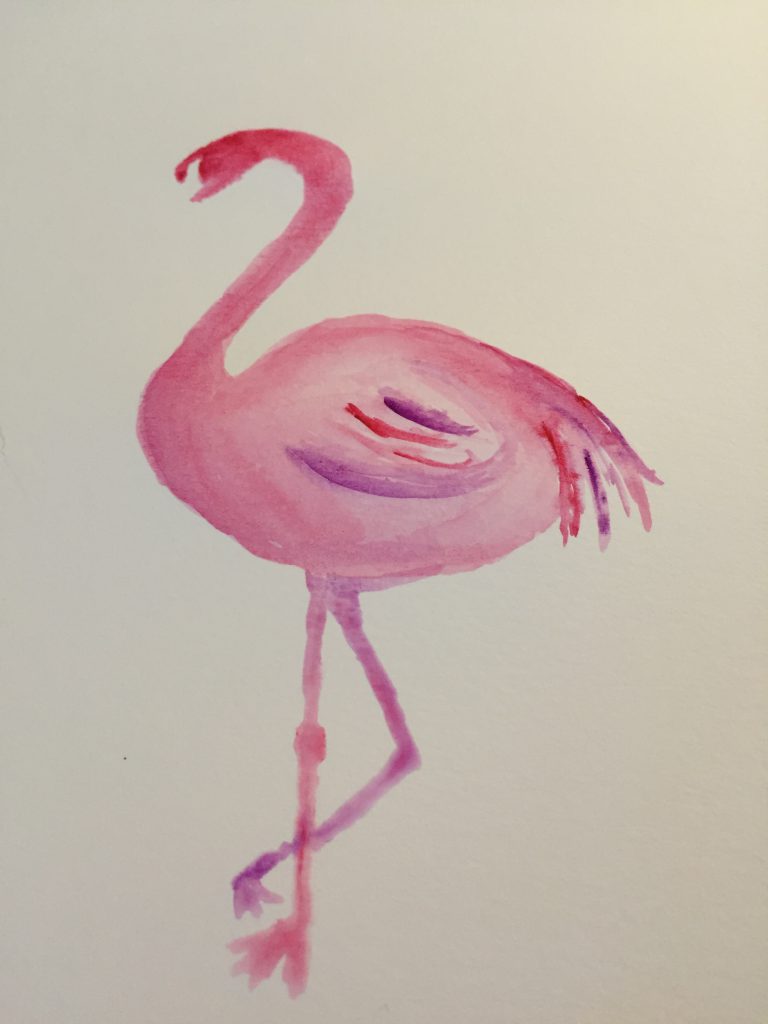
Continue to add paint to the body of the bird, adding in some feathers with deeper hues of red or purple. Once you’re happy with the body and neck of the flamingo, it’s time to add legs. Flamingos are known for standing on one leg, so that’s how we’ll make our flamingo stand.
With a neck, body, feathers, and legs, our flamingo is almost complete! You’ll notice in the picture below that I haven’t given the flamingo a face yet. I wanted the paint around the face to dry before I brought in a harsher color for the beak and eye.
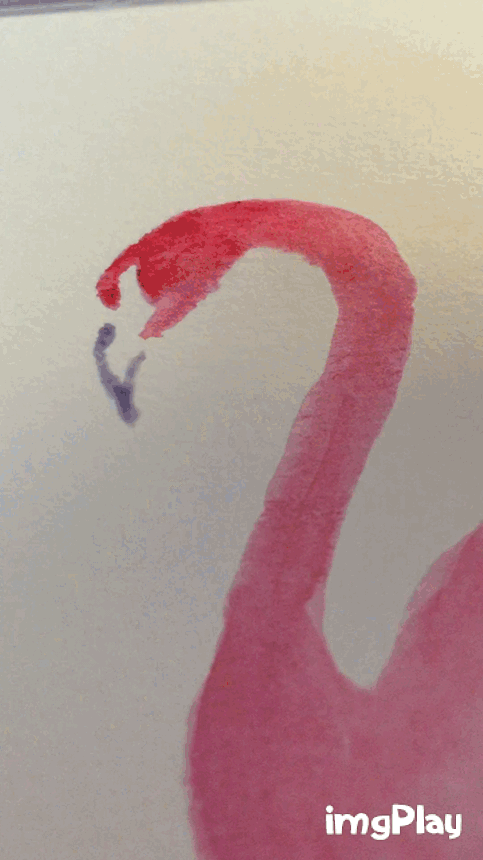
Mix purple, blue, and a spec of black together, adding in a bit of water to make the color not so harsh. Then, slowly create an outline for the beak, avoiding the pink parts of the head.
Add an eye with a fine point brush – just one small dab will do, and you should end up with the following.
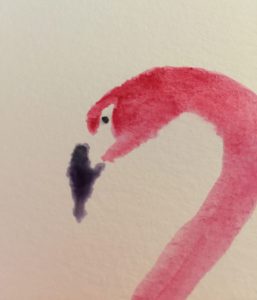
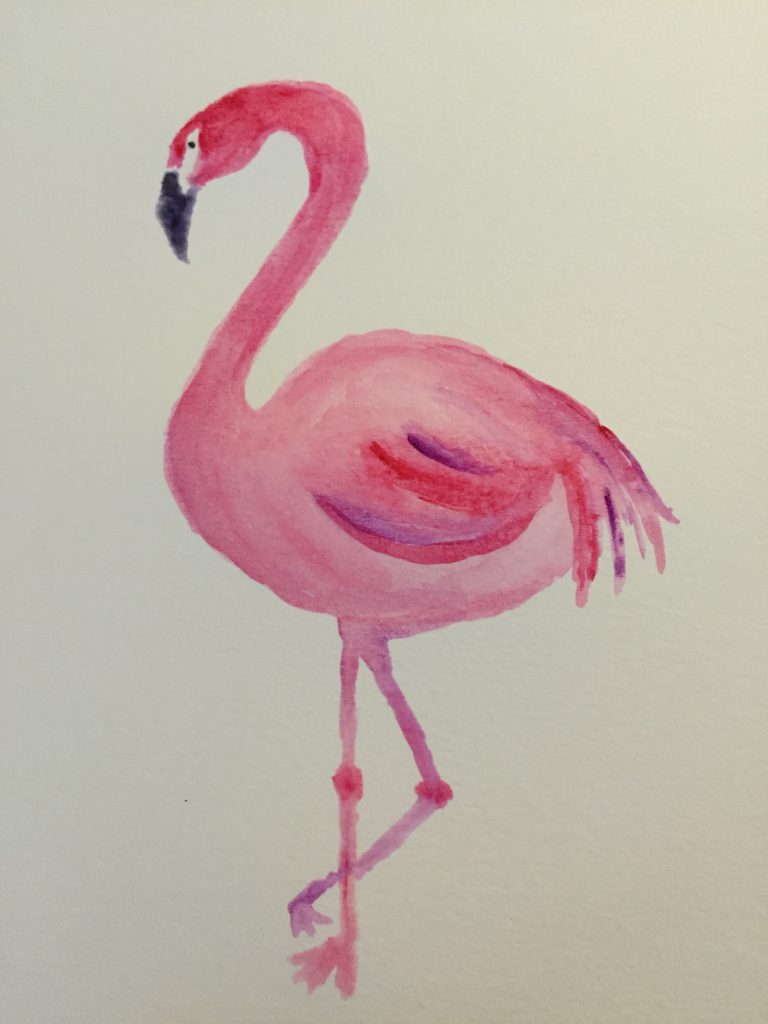
After adding in my beak, I felt the face was a little too skinny, so I added a little more pink to provide fullness to the face. And with that, under 15 minutes you have a pink flamingo ready for framing!
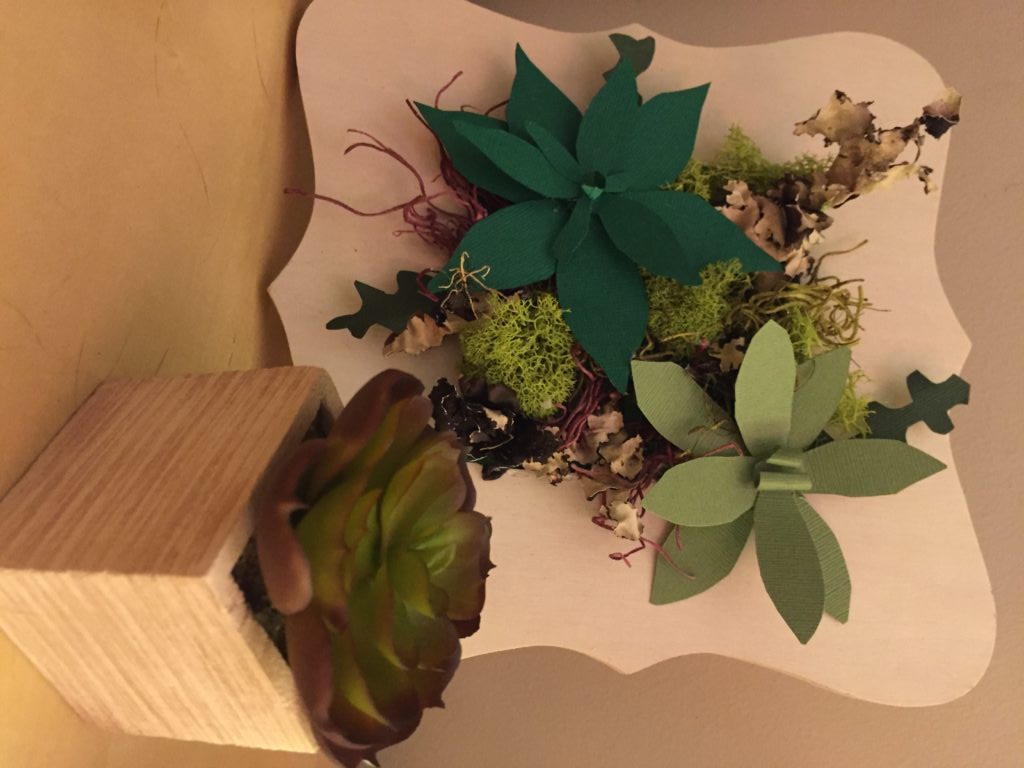
I love succulents. I’ve been pinning them and staring at etsy creations featuring them for a couple of years now. You can’t deny their beauty. What’s great about succulents is that there are so many varieties, colors, shapes, and sizes – literally something for everyone. Even men love succulents, a great alternative to flowers. They’ve taken off in the wedding world, and something I’ve considered using for my one day future wedding.
As I was scrolling through the Michaels website, I decided to check out classes being held at my local store. One of the options scheduled for June was a session creating succulent artwork out of paper! Yes, paper! I’ve already bought a teeny tiny succulent plant from Michaels, and have been contemplating buying more to spruce up my desks at work and home. But why buy plants when I can make something cute myself (with the help of Michaels still).
What you’ll need (I didn’t purchase everything in the above materials list):
Bazzill Basics Cardstock (2-3 colors) – .79/each
Artminds Unfinished Wood Frame – $1.00
Ashland Moss Variety Pack – $8.49
Glue gun
Paper plate
Scissors
Tweezers
Instructions:
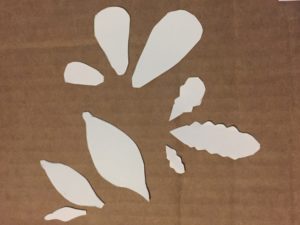
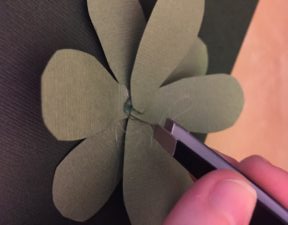
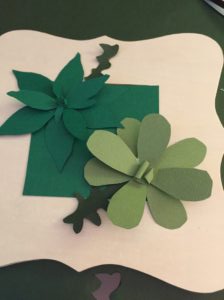
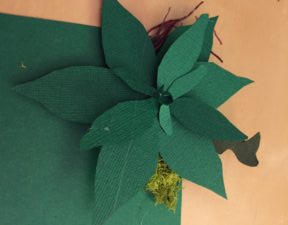
Draw different sized leaf shapes on a paper plate and cut them out. You’ll use these as your template to cut out your leaves in your selected card stock. While the example from Michaels has three different succulents, for this tutorial you’ll only be making two succulents.
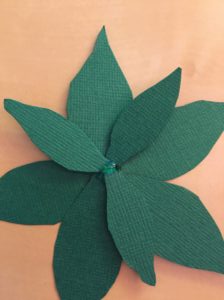
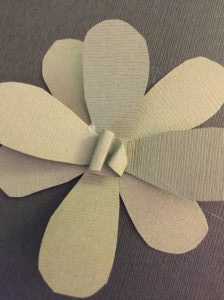
Use your templates to trace your leaves onto your cardstock. Then start assembling your leaves in a shape of your desire. Once you’re pleased with the design, start hot gluing the leaves together, overlapping. You may find using smaller leaves in the center of the succulent is more visually pleasing.
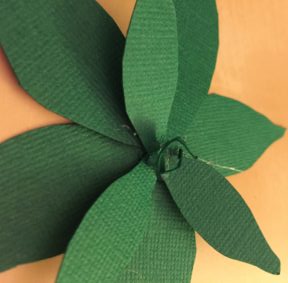
I then rolled a small leaf up to create a little center bud.
After you’re happy with your first succulent, create a second.
You may find the hot glue goes all over the place, leaving stingy pieces everywhere. Don’t fret! Just use a pair of tweezers to remove excess glue.
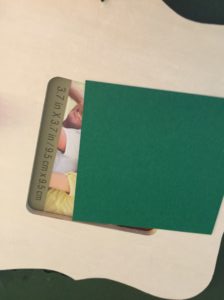
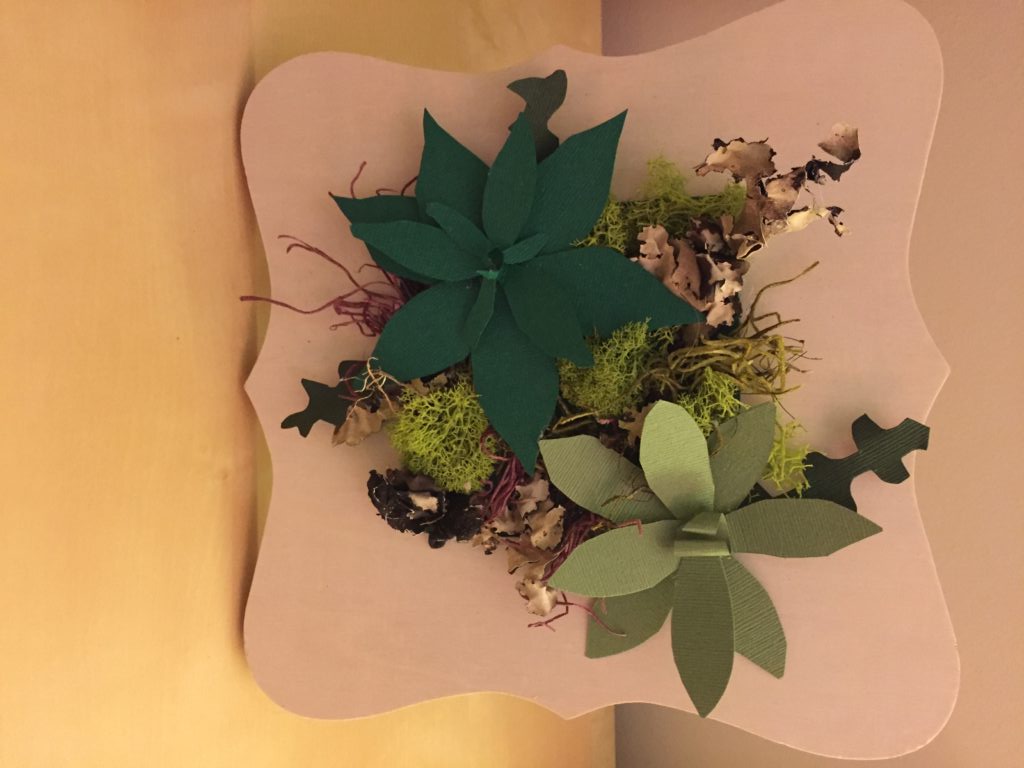
Next, we’ll want to cut a piece of cardstock that’s slightly bigger than the picture frame’s hole.
Once that’s measured, start placing your succulents on the paper (don’t glue them!) to get a sense of where things look best. You’ll see in the picture below I cut a couple leaves out and added them to the bottom of each succulent with my hot glue.
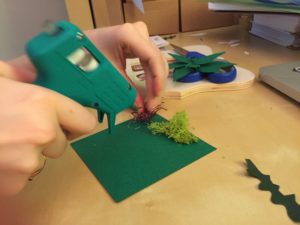
After you know where you want your succulents to go, it’s time to start playing around with our moss. This is where things get messy! The moss bits tend to break apart a bit, especially if you cut them into smaller pieces, which I recommend doing for this project.
Once you have some moss down, it’s time to attach your first succulent. Having moss below your succulents adds a 3D effect.
Continue to add moss around the first succulent, and then add your final succulent to the cardstock square. Once the square is completely filled, and you can’t see any of the cardstock beneath, it’s time to glue your creation to the frame. Add a thin line of hot glue around the frame’s opening, and press very lightly down with your cardstock. Within seconds the glue will be dry and it’s time to add the peg to the back of the frame and display your creation!
This creation would be great for a cheap centerpiece, desk decoration, or wall art.
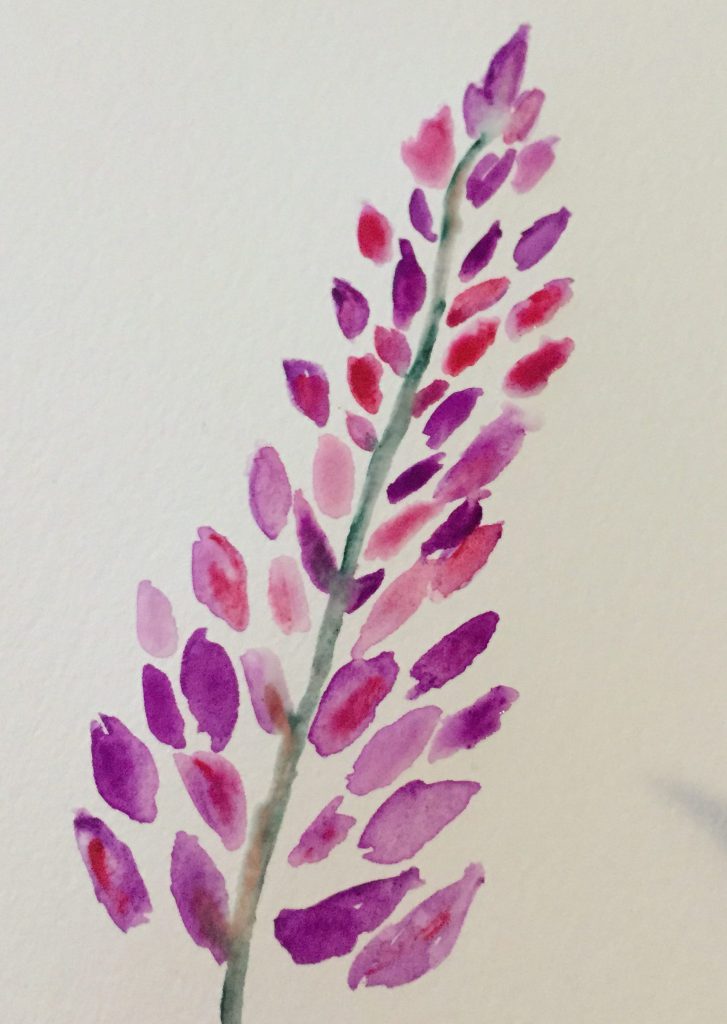
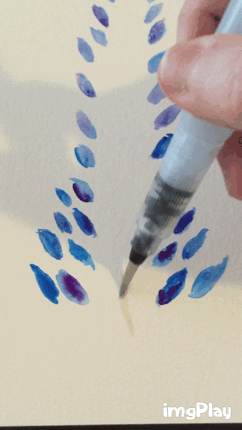
I’ve been meaning to try watercolors lately since the last time I recall using the medium was when I was a small child in art class. For my first watercolor post I wanted to share a very basic, safe for beginners, watercolor painting of Lupine flowers – a beautiful wildflower.
What you’ll need:
Water color paints (easily found at Amazon.com)
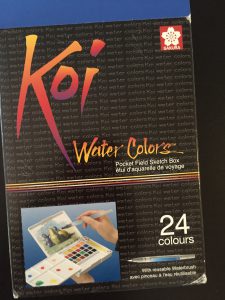
This Koi Water Colors kit comes with everything you need, including a water color brush that you fill with water!
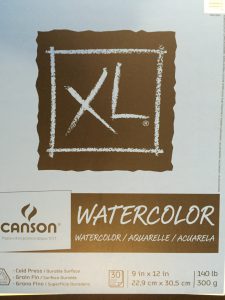
Watercolor paper (easily found at Amazon.com)
A paper towel – great for wiping up extra paint/water
Cup of water
Lupine flowers are kind of coned shaped with a bigger base of buds at the bottom with progressively smaller buds as you move up the flower, forming a point at the top.
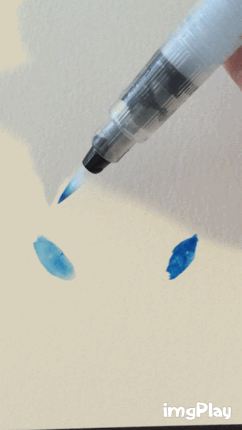
To get started we’ll pick a color and make imperfect tear dropped or oval shapes.
Continue making ovals and teardrops, moving up the paper creating a cone shape. Consider adding a second color to your buds to add a little depth or movement. The color will disperse throughout the bud since the blue paint is still wet. Let the paint do it’s thing! Perfection is not needed with watercolors.
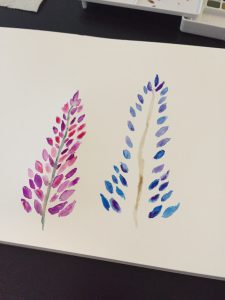
Once you’ve created a cone shape, create a light colored stem to bring your Lupine together.
If you’re like me you still have some gaps to fill in around the stem. Simply add more buds.
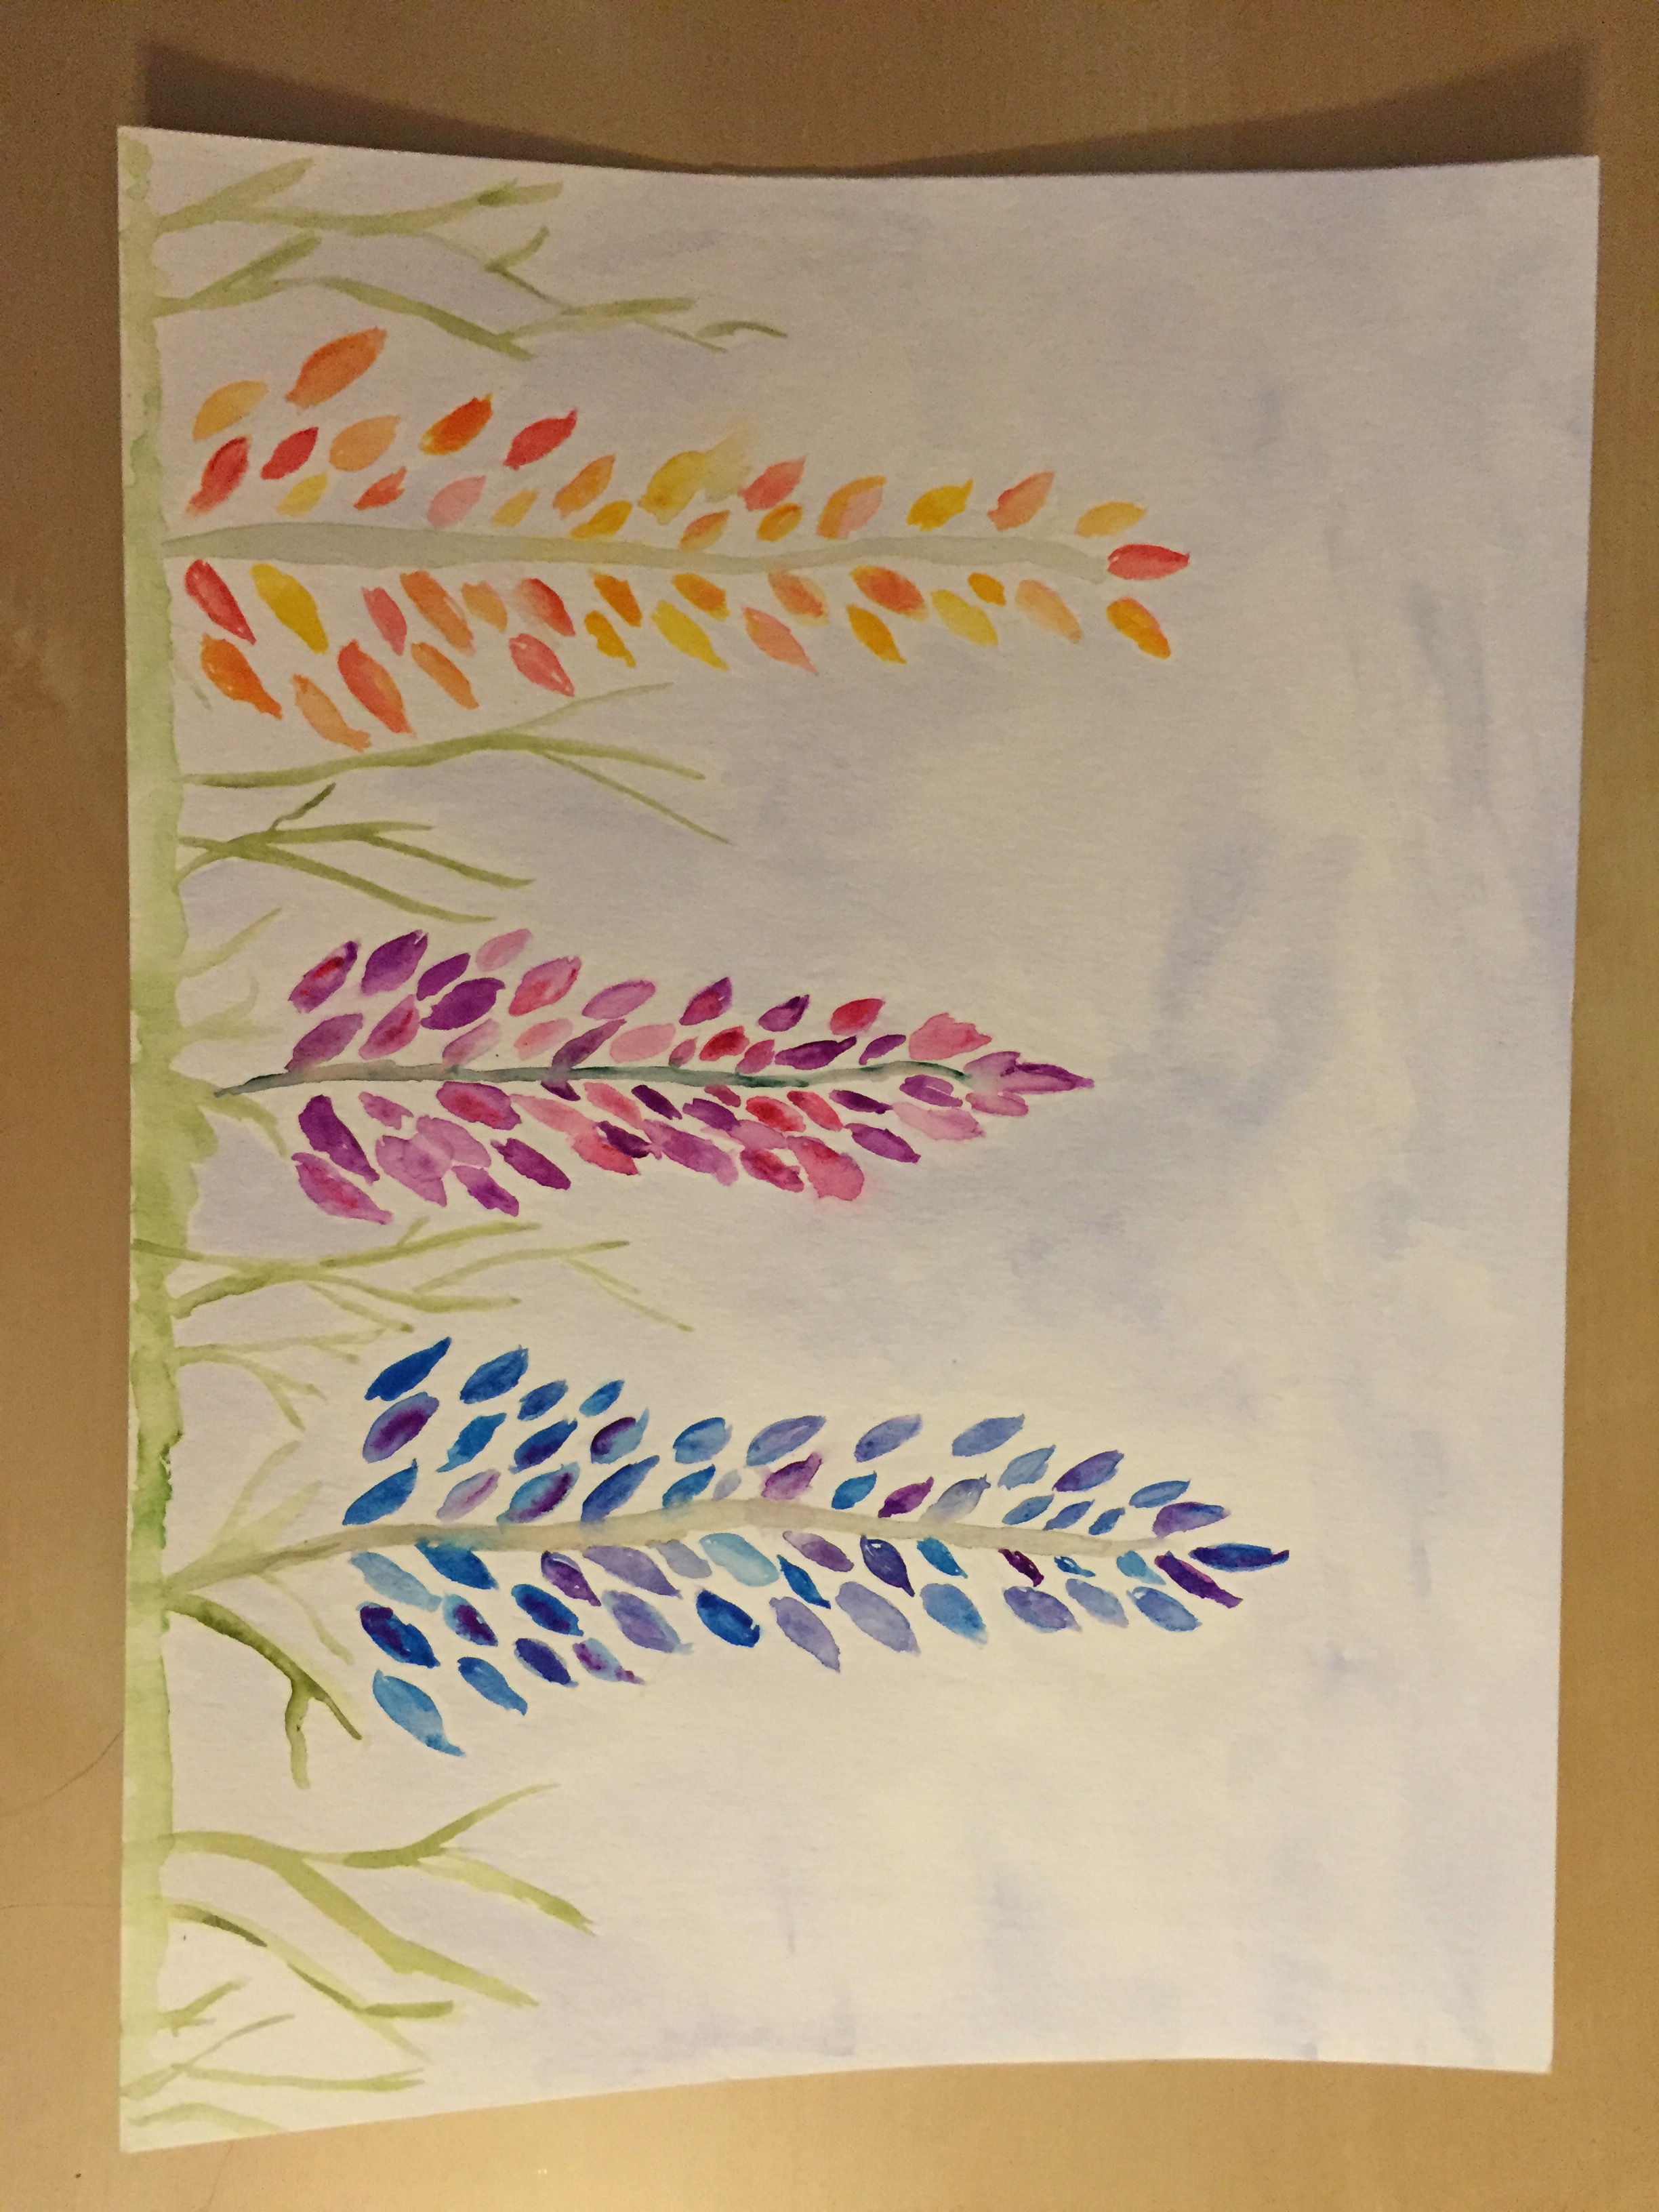
Once you have one Lupine flower, add additional ones to fill your paper and create a nice landscape. It doesn’t have to be fancy, but adding different colored Lupines is recommended.
Once you have 3-4 Lupines, add some grass at the bottom of your painting. Optional, add a blue background/sky by wetting the paper extensively and smoothing a blue paint across the paper, watering down the color so it’s pale and almost translucent.
And voila! Before you know it you’ve got a simple watercolor painting completed!
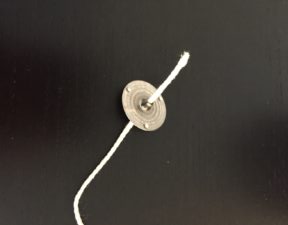 You’ll now cover that left over wick string with a wick sticker that will attach your tab and wick together, and it’ll keep your wick in place inside your candle.